Microsoft Word: How to create table of content automatically
5 mins read

A table of contents is just like the list of chapters at the beginning of a book. It lists each section in the document and the page number where that section begins. A really basic table of contents might look like this:
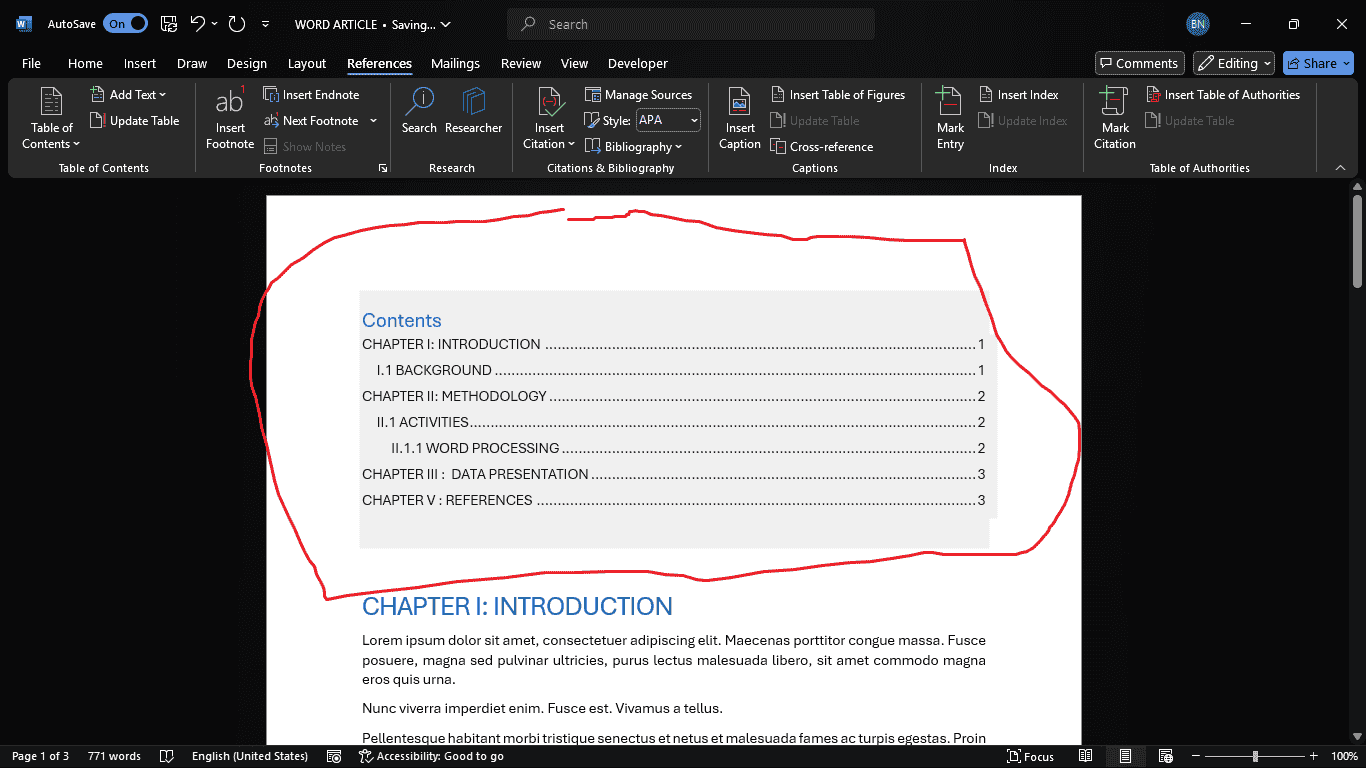
You could create a table of contents manually—typing the section names and page numbers—but it would take a lot of work. And if you ever decide to rearrange your sections or add more information, you'll have to update everything all over again. However, with the right formatting, Word can create and update a table of contents automatically.
Steps to insert table of content automatically
Step 1: Set Up Your Document
- Open Microsoft Word and create a new document (or use your already document with no table of content)
Add a title (e.g., "Breaking News:]") in a large, bold font.
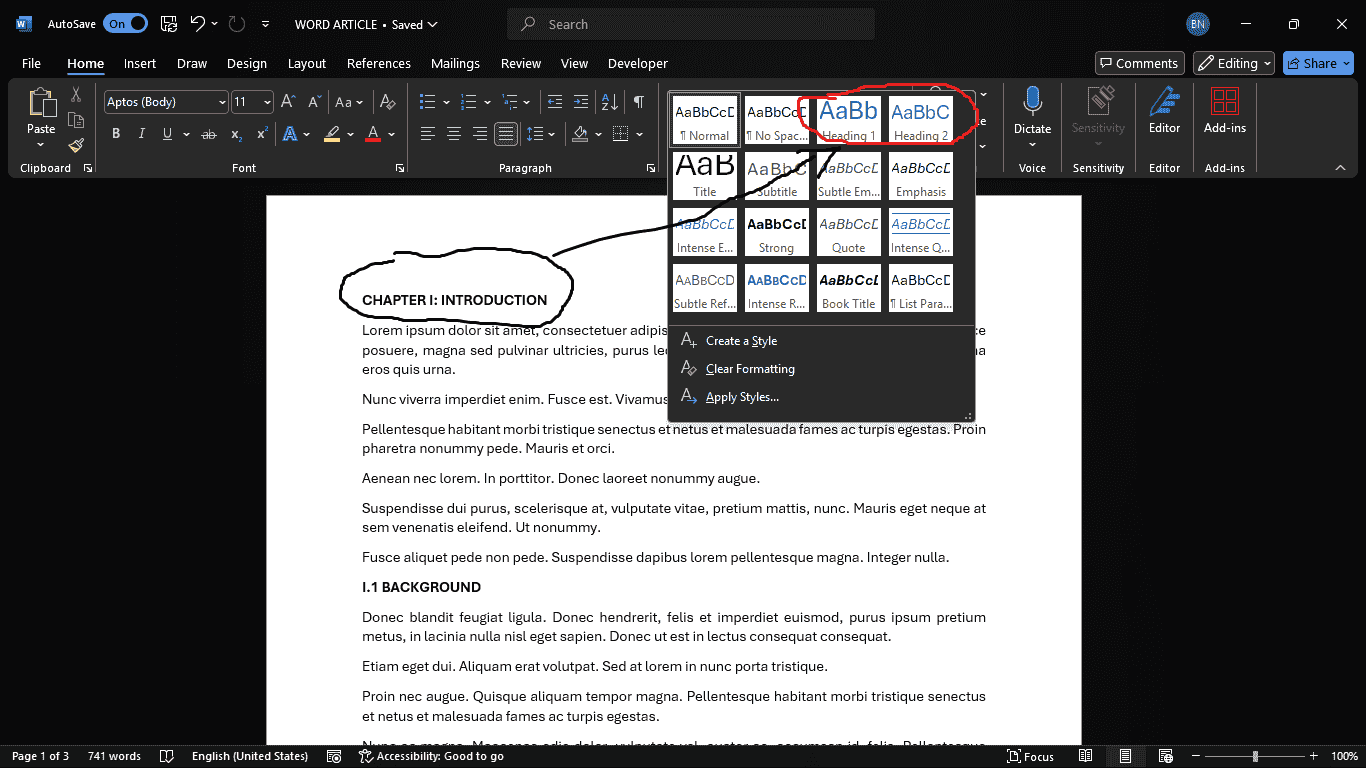

Step 2: Insert Headings for Table of Contents
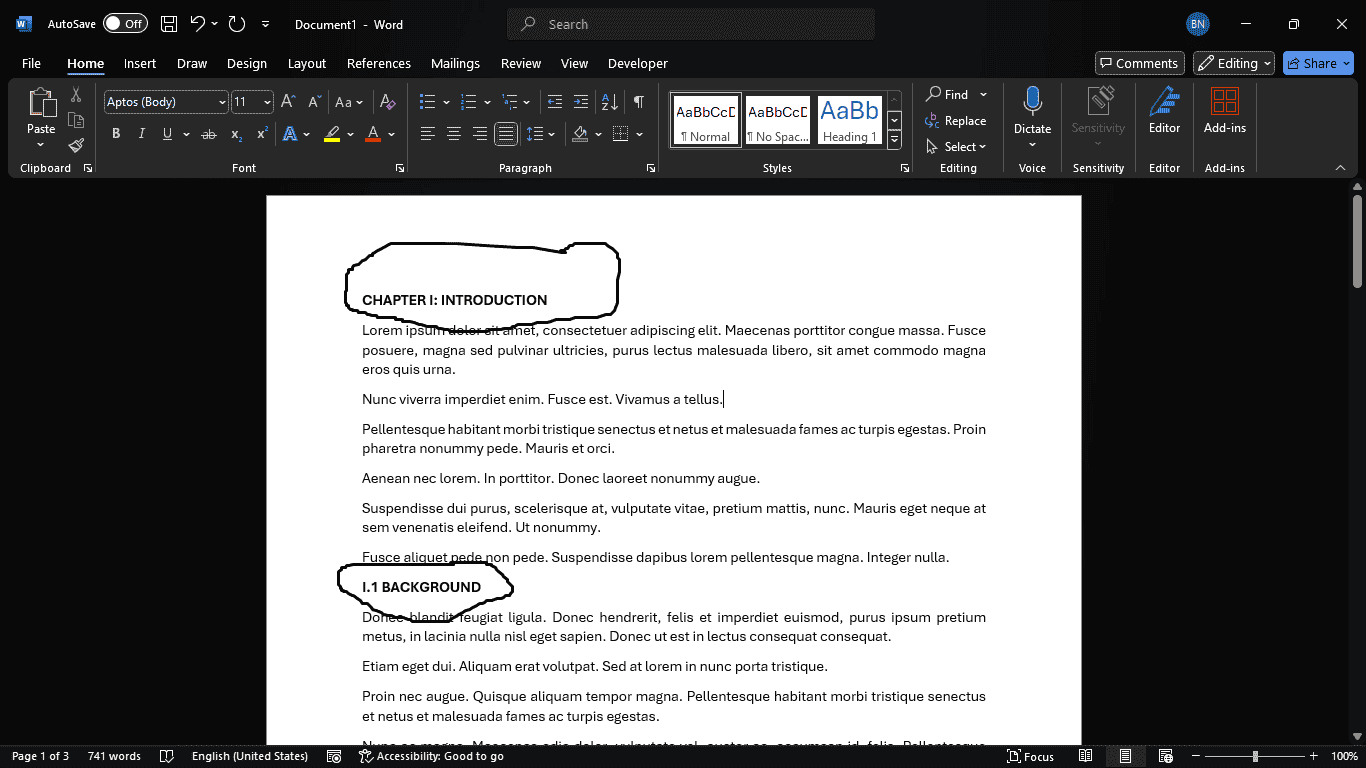
- Use Heading 1 for main sections (e.g., "CHAPTER I: INTRODUCTION" "CHAPTER II: METHODOLOGY" "CHAPTER III : DATA PRESENTATION").
- Use Heading 2 for subsections.
- Select text → Go to the Home tab → Choose a Heading style (heading should correspond to what will be included in table of content).
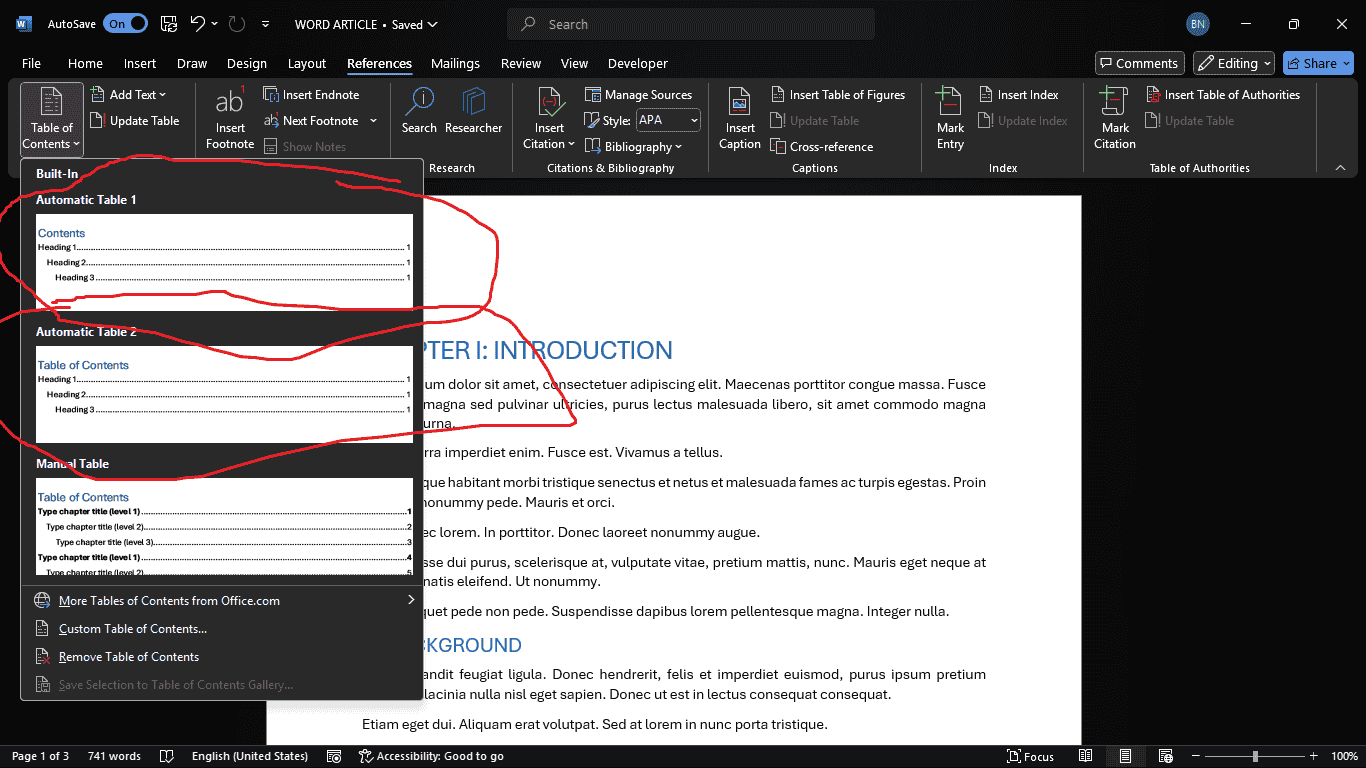
Step 3: Generate the Table of Contents
- Place the cursor where you want the the table of content to be placed.
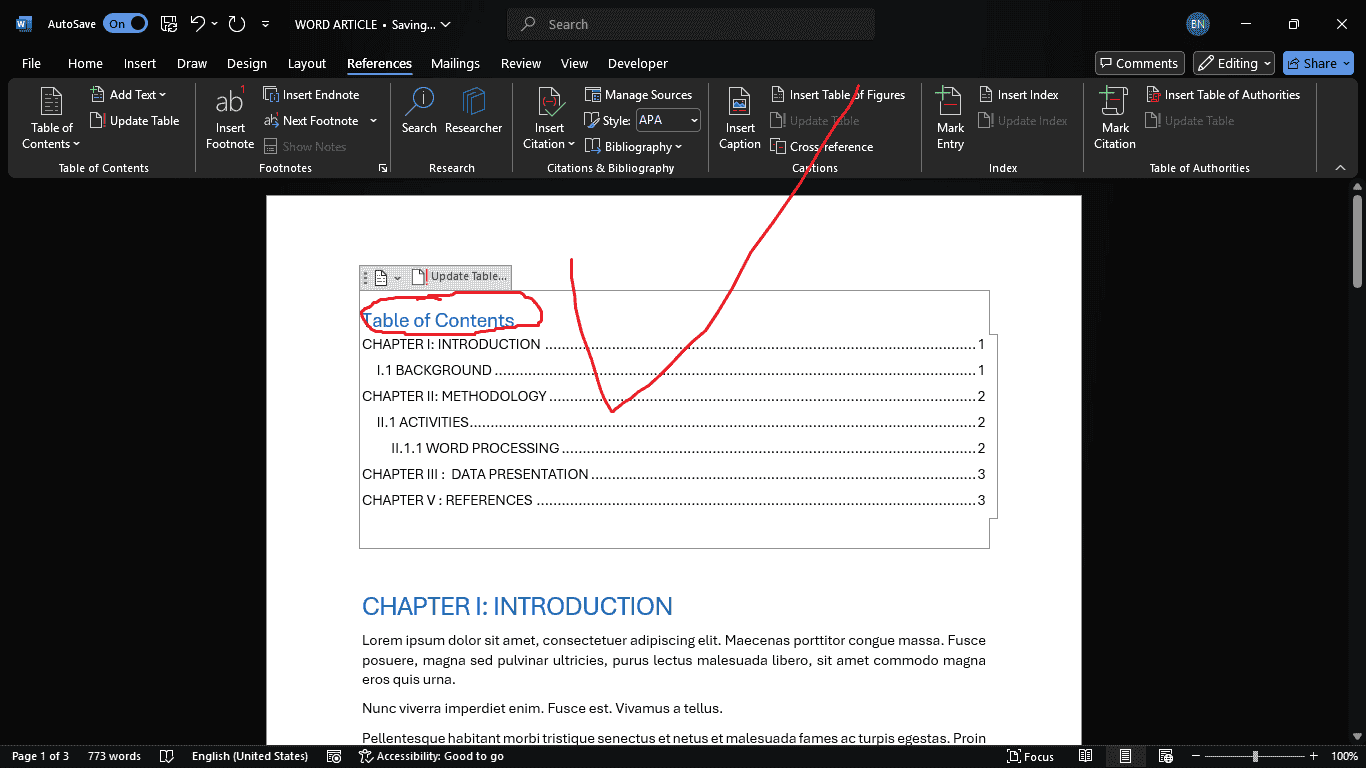
- Go to References → Table of Contents → Choose a style like Automatic Table 1 or 2.
- Word auto-generates it based on headings.
Step 4: Format & Finalize
- Adjust fonts, colors, and spacing for readability.

- Proofread and save (Ctrl + S).
No matter how large your document may be, you can see there's nothing complicated about creating a table of contents. If you want even more control over how your table of contents appears, check out this tutorial from Microsoft on Taking a Table of Contents to the Next Level.


